
We all live busy lives and it might seem like getting a domain name, setting up email, and starting a website might be too time consuming to fit in. But at Gandi, it doesn’t take long.
We know because we counted.
Let’s take a look at how you can go from zero to posting blog posts takes almost no time at all.
Step zero: Creative work
We’re not counting it on the clock, but there’s a fair amount of creative work to be done before you launch a website. First and foremost, there’s the question of choosing a domain name, which often overlaps with the name of your website.
Along with that comes creating a logo, deciding on a color scheme, thinking about what fonts you’ll be using, and other design questions. That’s not to brush these questions aside—they’re definitely some of the most important decisions to make when launching a new site—we’re just not counting this creative decision making “on the clock.”
Step one: Register a domain name, add Simple Hosting to basket, pay (3-4 minutes)
Once you know what domain name you want, start by going to gandi.net and typing it in to the search box. First you’ll see if your domain name is available, but you’ll also see a list of other, similar domain name suggestions. Add your domain name, and any others you’re interested in, to your cart, and click the shopping cart to check out.

When you get to the check out page, add a PHP/MySQL Simple Hosting instance of at least size S+ and proceed to payment. That’s it! Once the domain is registered, you’ll see it in your account.
Step two: Set up email (30-60 seconds per mailbox)
Email is an important component of your domain name to set up too. A common email address is admin@your-domain.tld, but you might also want contact@your-domain.tld, or sales@your-domain.tld.
To create an email address, click on your domain from your dashboard and then go to the “Email” tab. Click the “Create +” button to add a new mailbox.
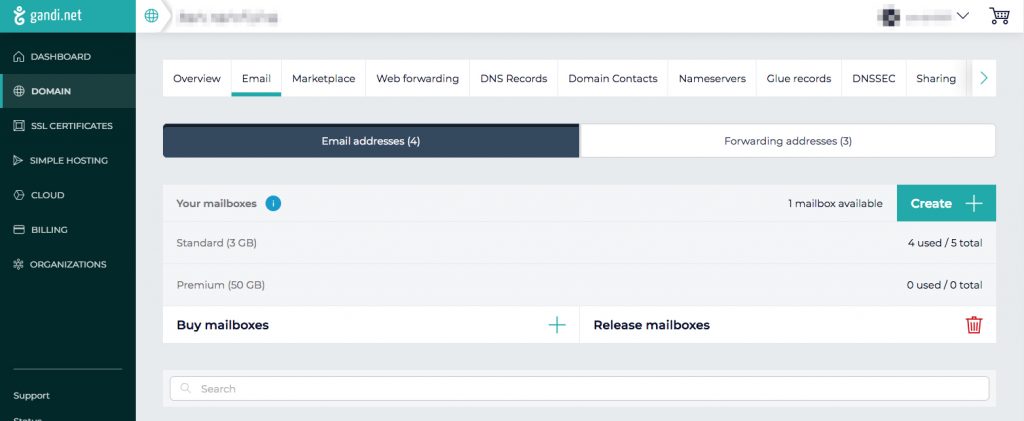
You can then set the password and add an Aliases you want. An Alias is an email address that forwards to the email address you’re creating. So if you wanted emails for sales@example.com to go to the admin@your-domain.tld mailbox, add sales@ as an alias.

If you want to create forwarding addresses that forward to email addresses not @your-domain.tld, click the “Forwarding addresses” tab and add your forwarding addresses there.
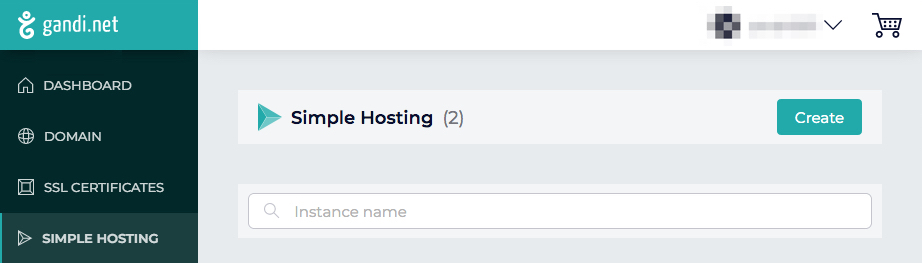
Step three: Create site on your Simple Hosting instance, add SSL, define instance password (4-5 minutes)
Next you need to create your site on your Simple Hosting instance. From your Dashboard, click the Simple Hosting option in the left-hand menu and then click on your instance.
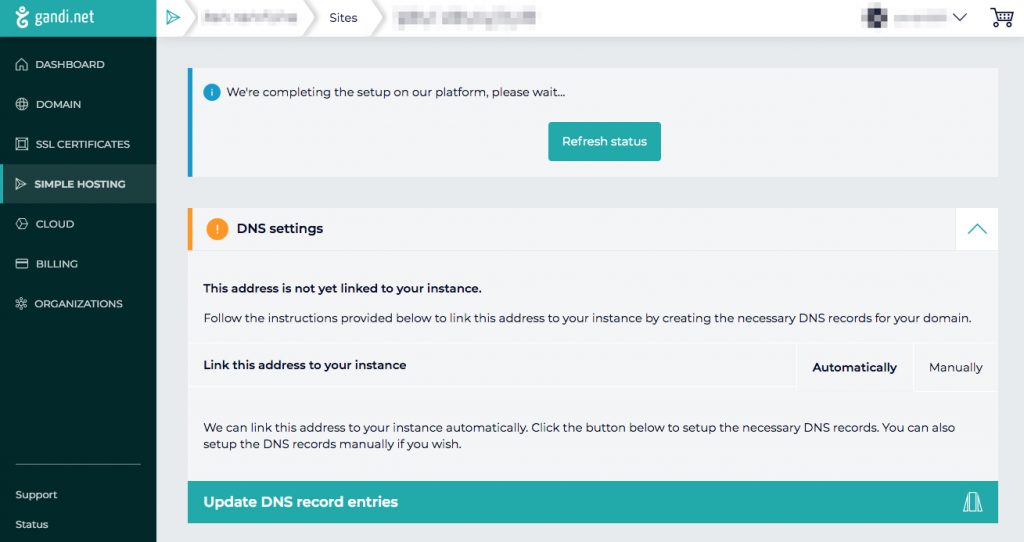
Go to the Security tab and define a password for your Simple Hosting instance. This password along with the instance username shown on the Security page will be required in step 4.
Go to the Sites tab and click “Create a site.”

Click the button to automatically configure DNS.
You’ll want to make sure your site is secure as well. That’s why we recommend generating a free SSL certificate for it.
Click the button to Generate an SSL certificate.
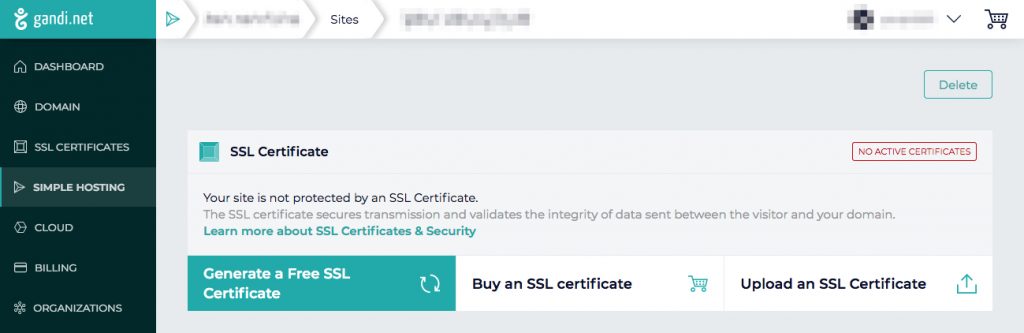
You’ll need to verify the SSL certificate via a link in an email you’ll receive shortly.
Click the link to verify your certificate and enter the code included in the email.
It may take a moment for Gandi to receive your certificate from the provider, but after about a minute, you can refresh your site’s admin page and see your SSL options.
We recommend using HTTP+HTTPS.
Step four: Install and configure WordPress (3-4 minutes)
Scroll down to the WordPress section on your site’s admin page and click “Install or Manage WordPress.” Use your instance’s login to enter this admin page.
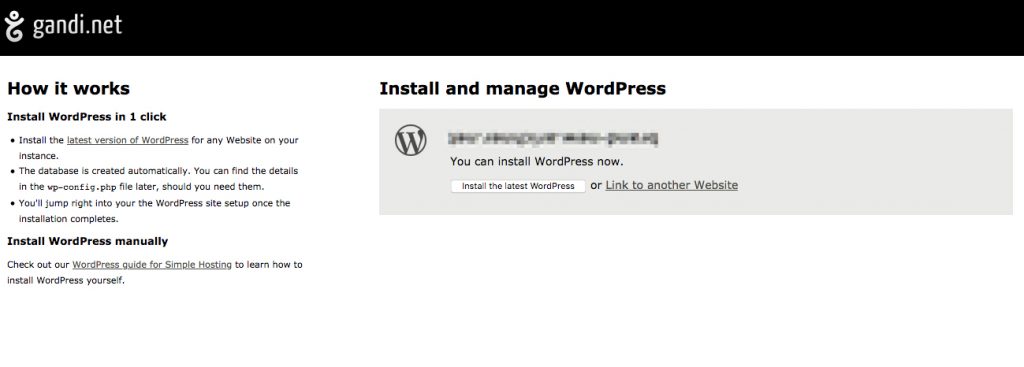
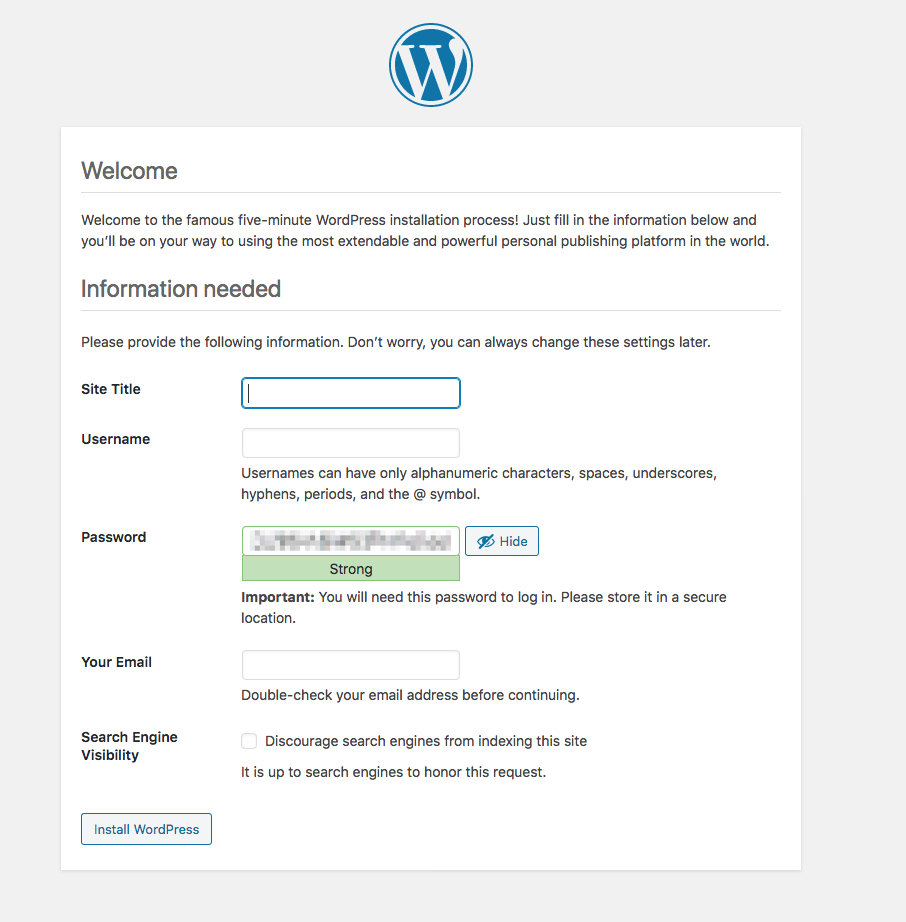
Click the Install WordPress button under your site’s name, then go to your WordPress site.
Select the language, choose a username and password, and login to your WordPress site.
Step five: Customize your WordPress site
Use WordPress’s built in customization tools or install plugins to customize your WordPress page and get posting!
In total, going from zero to posting only takes about 15 minutes on gandi.net—including setting up all the basics: a website, email, and SSL. That’s the amount of time it takes to fold your laundry, take a shower, or order and pick up a coffee.
That’s fifteen minutes that could be the start of a whole new you.
Got fifteen minutes? Register a domain and get started: