For the past few weeks, Mastodon has been a popular topic of conversation. This Fediverse social network has caught new wind its sails thanks to its similiarities to Twitter. So alike and yet so different, we’ll be going over everything that you need to know about how Mastodon works and how to join the Fediverse using GandiCloud VPS.
Fediverse, decentralized internet, federated servers, what are we talking about?
The easiest way to understand what the Fediverse is and how it works is to compare it to “classic” social networks, like Twitter, Facebook, Intagram, etc.
Centralized vs decentralized approach
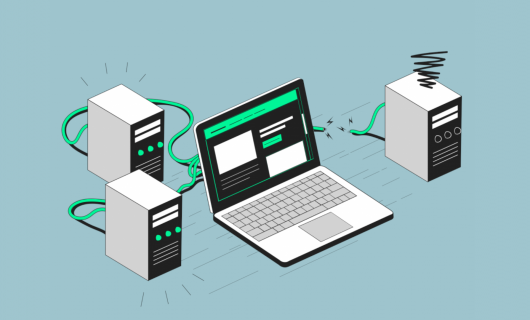
The “classic” social networks are managed by businesses that use a centralized approach; that is, they manage all traffic and messages. The opposite are the social networks that are part of the Fediverse which were created to be deliberately decentralized. Every user who wants to access the Fediverse needs to create an account on a web hosting instance, an instance on which their data will be stored. The user remains the sole proprietor of what they publish and defines for themself the level of moderation. It’s also not possible to be targeted with ads.
Federated servers
A second specificity of the Fediverse is that once a user has created an account on a web instance, they can access all the networks within the Fediverse (including Mastodon). Essentially, each server is completely independent, but can integrate with others to form a global social network, the Fediverse. That way, a user with an account on a instance A can follow and send private messages (or other actions available with that social media) and many other social media functions to a user on the same instance or to user on other instances (this is similar to Twitter without being centralized). Users of the social media use client software on their phone or computer to connect to their account and follow posts and see their timeline.
While creating a new account is required to access each typical social network, only one is necessary to access networks in the Fediverse.
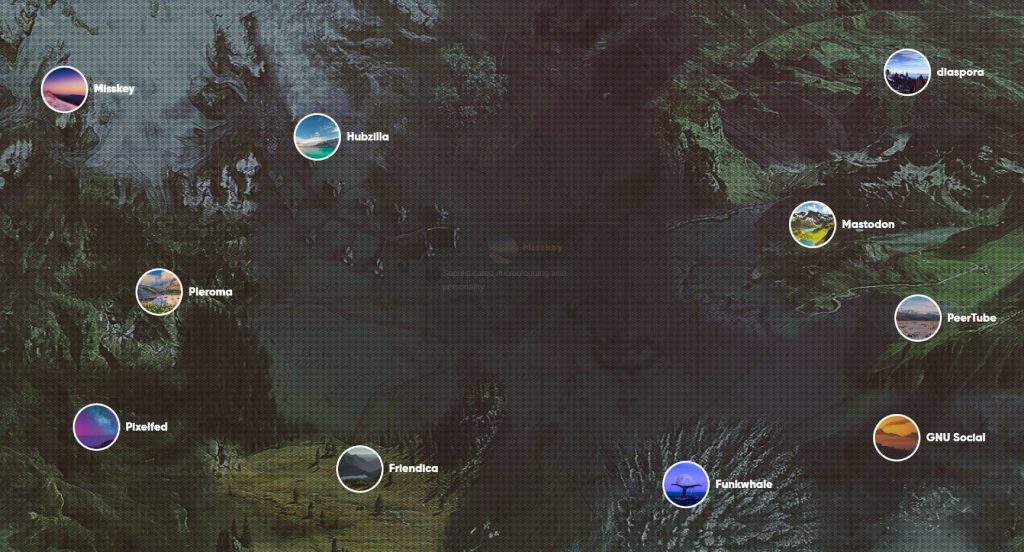
To continue the parallel, Mastodon and Pleroma are similar to Twitter, Pixelfed to Instagram, PeerTube to YouTube, or Vimeo, for example.
The differences between the Fediverse and “classic” social networks, then, ca be summarized as:
- you create a single account to access the Fediverse, an ecosystem of social networks rich in features (Pixelfed as equivalent to Instagram, PeerTube as equivalent to YouTube or Vimeo, etc.),
- you control what you publish and define the level of moderation that you want
- you maintain control over your data and avoid being targeted by ads
In recent news, Mastodon, one of the software in the Fediverse, is currently in the spotlight, thanks to its similarities to Twitter. It can, then, be an entrance point to the Fediverse. For that reason, the installation of Mastodon and all the software allowing them to run it are complex. That’s why we recommend using another software to join Mastodon and the Fediverse: Pleroma.
Plemora or Mastodon?
Pleroma is a lightweight software to start microblogging in the Fediverse social network and interconnect with other instances running other software like Mastodon. Pleroma could be used from the single user and admin use case to a public instance available for public registration.
Multiple software allow users to create instances in the fediverse. Another solution for the microblog is Mastodon. You can find a complete documentation on the projet website: https://docs.joinmastodon.org/admin/install/ Mastodon will requires more resources, especialy with a larger number of user. You may have to host yoru database on a specific virtual machine and your website in one or more VMs. You can connect each of the VM using Private VLAN using Gandi IaaS Cloud v5 or you can use mesh Virtual Private Network using GandiCloud VPS.
You can find all the detailed information about the install process from the project: https://docs-develop.pleroma.social/backend/installation/otp_en/
If, however, you prefer Mastodon, you can find complete documentaiton on that project’s site. Mastodon will require more resources, most of all with a large number of users.
Install Pleroma on GandiCloud VPS
1. Create the virtual machine
Create a virtual machine using GandiCloud VPS by connecting to the https://admin.gandi.net/gostack/ website. You will find a button to Create a new resource. Choose New Server. For the size of the server, it depends on your usage. V-R1 will allow you to host small Pleroma instances for you and your friends. If you want to open a publicly available instance, you will have to choose a larger size.
Gandi also offers an OpenStack API endpoint to create and handle your GandiCloud VPS with. See more documentation at https://api.gandi.net/docs/gandicloud/.
Once the Gandicloud VPS is created, connect using SSH with the ‘debian’ account and your SSH key to the virtual machine with the information available in https://admin.gandi.net/gostack for the server:
$ ssh debian@ip.ip.ip.ip
First, update all the pending update of the system:
$ apt -qq update && apt dist-upgrade
2. Prerequisite packages to install Pleroma
Install the first salve of applications for the installation
$ apt install --no-install-recommends curl unzip nginx libncurses5 postgresql postgresql-contrib postgresql-client libmagic-dev libimage-exiftool-perl imagemagick ffmpeg
If you want to use letsencrypt for the certificate, also add:
$ apt install --no-install-recommends certbot
3. Database configuration
PostgreSQL should already be started. You can tune the configuration using https://pgtune.leopard.in.ua/ with the resources of the GandiCloud VPS chosen.
Following pleroma upstream documentation, the target is 20 connections.
4. Install pleroma
Follow the effective instructions at https://docs-develop.pleroma.social/backend/installation/otp_en/#installing-pleroma
You can now manage pleroma using:
$ su - pleroma -s /bin/bash
pleroma$ ./bin/pleroma daemon
then:
pleroma$ ./bin/pleroma stop
5. Start script
In order to start Pleroma on the boot of the system and stopping the software when the machine shutdown, we need a system script.
According to your preference, you can either copy the systemd unit file like this:
$ cp /opt/pleroma/installation/pleroma.service /etc/systemd/system/pleroma.service
$ systemctl daemon-reload
$ systemctl start pleroma.service
$ systemctl enable pleroma.service
Or the initscript like this:
$ cp /opt/pleroma/installation/init.d/pleroma /etc/init.d/pleroma
And activate it in your system.
6. Create a certificate using LetsEncrypt
You can create a certificate with the public name you want to use. Add the name in your DNS zone and you can use the certbot tool.
$ systemctl stop nginx.service
$ certbot certonly --standalone --preferred-challenges http -d MyChosenName.tld
$ install -d -m 0755 -o root -g www-data /var/lib/letsencrypt
Then copy the nginx configuration:
$ cp /opt/pleroma/installation/pleroma.nginx /etc/nginx/sites-available/pleroma.conf
$ ln -s /etc/nginx/sites-available/pleroma.conf /etc/nginx/sites-enabled/pleroma.conf
Change some elements in the configuration like the name you have chosen instead of example.tld and start nginx:
$ systemctl start nginx.service
It should start without any error. In the other case, you will have this error “Job for nginx.service failed because the control process exited with error code.” and you can use journalctl -xe -u nginx.service to get more information about the issue.
At this point in the documentation, you can access the main page of pleroma in https://MyChosenName.tld.
7. Configure pleroma
The default configuration of the application is to allow public registration of new user on the instance. Unless you want this feature, you can disable it by changing the ‘registration_open: true’ to false in /etc/pleroma/config.exs in the “config :pleroma, :instance” section.
Another change is about the database configuration, you should disable generic query plans for the PostgreSQL queries, see https://docs-develop.pleroma.social/backend/configuration/postgresql/ for more details:
config :pleroma, Pleroma.Repo,
prepare: :named,
parameters: [
plan_cache_mode: "force_custom_plan"
]
You also will find a cheat sheet with many many configuration keys to change in the /etc/pleroma/config.exs file here: https://docs.pleroma.social/backend/configuration/cheatsheet/
8. Create the admin account
As stated in the documentation: https://docs-develop.pleroma.social/backend/installation/otp_en/#create-your-first-user-and-set-as-admin
$ su - pleroma -s /bin/bash
pleroma$ ./bin/pleroma_ctl user new my_login my_email@domain.tld --admin
[ ... ]
URL: https://.../api/v1/pleroma/password_reset/...
Copy and paste the full URL you obtain, to your browser to finalize your first administrator account by setting a password.
You will then be able to login on your own pleroma instance with the login and previous password. You can change many settings by clicking on the clog wheel on the top right and especialy the MFA/2factor in the Security section.
You now have access to the Fediverse. Before putting the installation process behind you, we recommend you first carry out the following post-configuration steps as soon as possible.
9. Post configuration
1. Automate Let’s Encrypt renewal
Still following the upstream documentation, you should apply the post configuration about Let’s Encrypt:
https://docs-develop.pleroma.social/backend/installation/otp_en/#post-installation
2. Enable media proxy
You can activate a cache for the media from other instances for a easier timeline read for your user.
See more context in the upstream documentation: https://docs-develop.pleroma.social/backend/configuration/howto_mediaproxy/
If you follow our guide, the nginx configuration is already handled.
3. Hardening
The upstream developper added a section with the best practices to enable for the security of your web application installation.
More information here
4. Backup
If you are using your pleroma instance you will have to backup the configuration and the user data. Follow the guide from the upstream documentation here:
https://docs-develop.pleroma.social/backend/administration/backup/
Your installation is now complete! You now have access to all the social networks in the Fediverse via Pleroma. Enjoy!
Tagged in Cloud