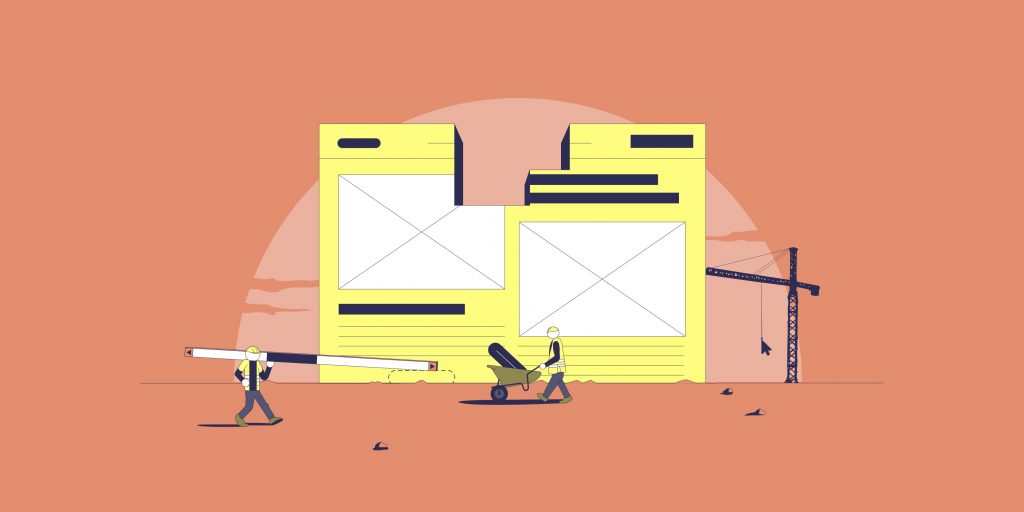
You’ve determined that you need a website. You know that an online presence is crucial for whatever your project may be and you’re ready to start building, but don’t know where to start.
Don’t worry! It’s not as overwhelming as it may seem. You can create your website in 5 easy steps:
- Design and plan your website
Decide what kind of site you want and map out the structure and design. - Set up your website
Choose a CMS, purchase web hosting, register a domain name, and link it to your hosting. - Choose a theme or template
Pick the theme or template that best matches your website plan. - Add SSL
Make sure your website ranks well and protects your visitors’ personal data using the HTTPS protocol.
Read on to learn more.
But first! Do you need a website? If you’re not sure, find out more here.
1. Design and plan your website
The first phase of creating a website involves some basic planning and designing and the first question you need to ask is what kind of site do you want to have?
This largely depends on what you want to use your website for. Here are some basic types of website that you could choose to create:
Types of website
1. E-commerce
Do you want to use your website to sell merchandise? Then you should create an e-commerce website that has a catalog of products and payment and checkout.
2. Blog
Do you want to publish content on a regular basis? Then you should create a blog with options for sorting content like categories and tags.
3. Nameplate / Showcase Site
Do you want to have a kind of virtual business card that you can provide to people you meet or prospective employers? Then you should create a nameplate site that has a bio, some photos, and your resume.
Once you decide what type of website to make, this informs the basic structure of your website and you can start thinking about how to create the basic graphic design of your site.
Not sure whether or not to create an e-commerce site?
Design the graphic identity of your website
Now you can move on to determining the graphic identity of your site. The color codes, logos, the font size that you want to use, animations, etc — everything related to the visual aspect of your project.
Create a site map
List all the pages, sections, and subsections of your website, based on the type of website you’re creating and create a map of your website’s structure along with a short description of each page, section, and subsection.
Create a technical description
Next, map out all the technical features that you will need — from a contact form, a slider, a search bar, etc. to a shopping cart feature, category pages, or a PDF reader for your résumé. Try to anticipate your needs so that you can make the right selection when it comes to a Content Management System (or CMS, the tool you use to create a website).
Now that you’ve figured out the structure of your website, you can start the process of bringing it online.
2. Set up your website
Now that you’ve determined what type of website you’re creating, it’s basic visual identity, and the basic structure of pages, sections, and subsections, you can move on to actually bringing your plan to life.
There are two basic first steps in doing this — first set up your hosting, and then register your domain name.
Set up hosting
Your website’s hosting is where the content of your website lives. Most websites these days are in some way dynamic, meaning that the content of your pages is determined using a certain amount of code.
That’s what enables you to quickly and easily update your website when you create new content for your blog, when you add products or change pricing, or when you update a résumé or add a new personal photo in your bio.
Luckily, you don’t have to juggle all of this content and the code necessary to display it on your own. You can automate all of that using what’s called a content Management System, or a CMS.
Picking a CMS is the first step to setting up your website’s hosting.
Choose a CMS
The first step in choosing a CMS is determining what you need out of your CMS. This goes back to the question of what type of site you have, or what you’re going to use your website for.
Beyond what you’re using your website for, you also need to think about who will be involved in creating your website, and who will maintain it, as well as what features you’ll want from your CMS, and whether it will need to integrate with any other software you’re using.
Read more about figuring out what you need out of your CMS
From there, you can create a short list of options.
There are two in particular that we’d like to highlight since they are both very common, they’re both free, and they are both super easy to set up at Gandi.
WordPress
WordPress is by far the most common CMS, particularly for blogs. Depending on who you ask, it’s used by something around half of all websites on the internet, and it’s highly customizable, with hundreds if not thousands of solid plugins available that can quickly and easily add features to your website when you need them.
Best of all, WordPress is totally free to use if you install it on your own hosting instance.
We’ve made it especially easy to install WordPress on a Gandi Simple Hosting instance.
In fact, it’s so simple to set up, you can go from zero to posting your content in 15 minutes or less.
An e-commerce plugin also exists for WordPress (called WooCommerce), but we suggest going with a specialized e-commerce CMS.
Prestashop
For that, there’s Prestashop. Prestashop is an e-commerce-specific CMS. One of the most widely used e-commerce CMS in the world, it’s also open-source, which gives you complete control over your data and enables you to ensure your customers’ data are safe too.
You can install Prestashop quickly and easily at Gandi.
Using our automatic Prestashop installation, it doesn’t take long at all to get your e-commerce site online.
Other CMS options
Some other common options for CMSes are Joomla! and Drupal for blogging and Magento or Shopify for e-commerce. Be sure to check the requirements of these CMSes in terms of the programming language used and the database management system. These may impact what type of hosting you’ll need to get.
Check out this article that highlights the pro’s of choosing Magento solution for your e-commerce site.
Sign up for hosting
With our WordPress for Simple Hosting and Prestashop for Simple Hosting options, you can install your CMS on a Gandi Simple hosting instance quickly and easily.
If you’re going with another CMS option, you’ll have to do this process manually. To do this, you’ll need to:
- Create a Simple Hosting instance
- Add your site’s address
- Upload your CMS files
- Install your CMS, according to your CMS’s installation process
Before you start, you’ll need to know the programming language and database requirements for your CMS of choice. WordPress, for example, uses PHP for its programming language, and MySQL for its database management.
As you’re setting up your hosting, you should also be thinking about what your domain name will be. We’ve listed registering a domain name after setting up hosting, but the reality is that these two steps happen concurrently.
Register a domain name
Your domain name is the basis of your online presence. It’s the basic foundation you’ll build your website on.
What’s a domain name?
Simply put, a domain name is a type of internet address.
This isn’t just how people find your site, but it’s also the basis of your email address, and other services you might link to it.
Technically speaking, your domain name links up a human-readable address with something that understands computer address. That is to say, it links a word or phrase (your domain name) with an IP address.
Practically speaking, though, your domain name is what makes you you on the internet. Similar to a brand name or a logo, it’s something that coheres your entire online identity. As your users, customers, or audience get to know your domain name, they come to trust it and have confidence in you.
Choose a domain name
Just like the first step in creating a website is thinking about how you’ll be using it, the first step in choosing a domain name is thinking about how you’ll be using it as well. It’s not just important to consider the content itself, but also where you’ll be sharing it and spreading it.
Will you be posting it on social media? Will you be telling people you meet about it verbally? Will you be printing it on billboards or business cards? Will people look for it on search engines? These are all important questions to answer, but in all of these cases, it’s best to follow a few simple rules for a good domain name:
- It should be meaningful and relevant
- It should be simple and memorable
- Its spelling should be obvious
- It should be descriptive
Stick by these rules and you’ll be sure to choose a domain name that works for just about anything you’ll use it for.
Read more about how to choose a domain name
Check for domain name availability
Once you’ve picked a good domain name, you can use our domain checker at https://shop.gandi.net/en/domain/suggest to see if your domain name is available to be registered.
If not, you can pick from the suggested related domains our domain checker provides.
Depending on what kind of website your building for what kind of audience, you might also want to register the same domain name across multiple domain endings — for example, you might register both the .com and .fr versions of your domain name.
Buy your domain name
When you know what domain name or domain names you’re going to buy, you can simply register them from the domain checker tool.
If you’re use one of our website installation services, like WordPress for Simple Hosting or Prestashop for Simple Hosting, choosing a domain name will be part of the process, in which case your domain name will be automatically linked to the website you’re creating.
Set up your domain name
Gandi domain names come ready to use and batteries included, meaning everything you need is already there and connected as soon as your purchase goes through.
There is some configuration you might need to do, though.
As we mentioned, when you’re using our website installation services, your domain will be automatically linked to your hosting instance. However, if you’re installing your CMS manually, you’ll need to link up your domain name to your CMS.
Your domain name comes with two free email addresses as well, and setting these up is also an important step in creating your website.
Choose a site theme or template
Now that your website has a CMS, hosting, and a domain name and is online, you can set to work implementing your design plan using your CMS.
With most CMSes, you’ll have the option to choose from a number of different themes and/or templates to use for constructing your site.
A theme defines the structure and the general design of your website and will correspond to the type of site you’re creating.
When you choose WordPress you have the choice from a wide selection of various free and purchasable themes. From there, it’s just a question of picking the one that you like the best and which corresponds to the general design and structure of your site.
How to choose a theme
Before making your decision regarding your theme, take care to:
- Get to know the options of the theme: this theme needs to correspond to your needs. It has different fonts and colors available, and there are different placements for images, etc.
- Make sure the theme is updated regularly: that means the developers of the theme are fixing bugs and adding features regularly.
- Look at a theme’s popularity: it’s not necessarily a bad thing to pick a popular theme. I fact, it implies that the theme is getting regularly updated and that it’s an intuitive and flexible theme. OceanWP and Astra are two examples of great, popular WordPress themes.
Install a theme in your CMS
The next step is to install the theme in your CMS, once you’ve selected it. In WordPress, there are two ways you can do this. You can download the theme from the WordPress theme library in WordPress or you can buy a theme on another website and import it into your WordPress account.
To download a theme in WordPress, from your WordPress admin page, click on “Appearance” on the right, and then on “Themes.”
Click “Add new” to see WordPress’s theme library.
From here you can preview and select a theme to install. Once installed, you just need to click on “Activate” to import it directly to your site.
To add a theme you bought on another website, when you click on “Add new,” but instead of searching for a theme in the library, click the “Upload a theme” button on the right. Then you just need to select the file you downloaded, install it, and activate.
For other CMSes, the process can be similar or different.
Create your own theme
In WordPress, you can also edit your current theme to make minor changes, or you can upload a blank theme you can find online and build your theme from scratch.
Fair warning, you’ll need solid knowledge of both CSS and HTML to do this. Otherwise, be prepared to take the time to learn these things or else hire a website designer to build a custom theme for you.
4. Add SSL
Creating trust is a critical part of the relationship that you build with your website’s visitors, whether they are your audience, your users, or your customers.
This is even more important if you expect them to give you sensitive information, like their credit card information, or a user login and password. That’s where SSL (also known as TLS) comes in.
In addition to protecting your website, an SSL (or TLS) certificate can also help with your website’s search engine ranking.
The role of an SSL/TLS certificate
An SSL/TLS certificate enables you to protect internet users against the theft of their data using the HTTPS protocol. As opposed to HTTP, HTTPS adds a layer of security to any exchange of data. Instead of being exchanged in view of anyone who might be interested, HTTPS acts like a secure tunnel between a web server and a web browser. That way, data can pass between two parties in total security. Even if someone manages to intercept your data, it will be encrypted and unreadable to them.
The sign that a website and any data entered on it is protected in this way is the small green lock in the address bar and the ‘https://’ at the beginning of the address.
Why use an SSL/TLS certificate?
Initially, SSL/TLS certificates were mainly used by e-commerce websites and for handling private data. But since 2014, data privacy has become a priority for search engines. The HTTPS protocol is now considered by Google to be a key ranking criterium.
It’s now highly recommended that any and all websites use SSL to secure their sites. This allows you to ensure that:
- Any data transfer is secure
- Your visitors have a quality experience
- Better natural SEO ranking
And not only that, you get your SSL certificate for free for the first year when you buy a Gandi domain name and free forever when you host your website with Gandi’s Simple Hosting.
Choosing a type of SSL certificate
Which type of SSL certificate you choose will depend on how you intend to use it with your website. Gandi offers 3 SSL solutions, depending on the level of security and the financial guarantee you’d like:
- Standard certificate: ideal for securing an admin interface, a members-only space, un intranet, webmail, etc.
- Pro certificate: this type is generally used to secure e-commerce websites or a customer login area with sensitive data. That’s because these certificates also offer financial protection in addition to security.
- Business certificate: ideal for securing large or popular e-commerce sites, or a site that manages highly sensitive information. These certificates offer the highest level of protection currently available.
Learn more about each type of SSL certificate
If you’re just starting out, we would recommend getting the free certificate. This will provide the same level of security as a standard certificate and can be automatically installed on your Simple Hosting instance.
Generate your SSL certificate
To use a free SSL certificate at Gandi:
- Navigate to your Simple Hosting admin interface in your Gandi account
- Choose the instance where your site is hosted
- Click “Generate a free SSL/TLS certificate”
- Accept the contract
- Click on “Generate”
The creation process is then automatically launched and the HTTPS protocol is available for your site after a short interval.
Four steps to create a website
Creating a website doesn’t have to be hard or intimidating. It takes a little bit of planning, but once you’ve decided to create a website, you can get it up and running in these four steps:
- Plan your website
- Buy a domain name and hosting
- Choose a template for your site
- Add SSL to your site
From there, you’re ready to sell your products, share your thoughts, and publicize your skills and experience. In other words, you’re online! Now read about how much a website costs.
Tagged in .com.frCMSDomain GuideprestashopSimple HostingsslWordpress