Sieve server rules activated on Gandi Mail
As the reimagining of our platform advances, we’ve turned our attention in part to tools related to email management at Gandi. The first step in this process was to introduce in our new webmail SOGo in beta, just a couple of weeks ago.
One of the big advantages we were hoping to realize in reworking our email service was the ability to manage mail filter rules, so today we’re happy to be introducing Sieve protocol on all Gandi Mail accounts.
If the word “Sieve” already had you jumping for joy from just the article title alone we don’t need to explain much more than just to say that Sieve filters can only for the moment be configured in the Settings within the SOGo web interface.
To activate filters, you just need to go to https://sogo3.gandi.net/, click the gear icon to access the Settings, click Mail, then Filters, then Create Filter.
For those committed to Roundcube, the option to manage Sieve filters will soon be available from there as well, so stay tuned for us to announce that in the coming days
If on the other hand, Sieve is not something you’re familiar with, it will be a game changer for anyone using Gandi Mail. Allow us to explain.
The Sieve protocol allows you to activate specific rules that are then applied to emails upon arrival at our mail server. These rules can be used to pre-sort email into specific mailbox folders, to forward certain emails upon receipt, to send an auto-reply (such as an out-of-office message) and of course to put custom spam filters in place.
Sieve is activated on all email accounts, regardless of whether they use Gandi Mail or the Gandi Mail Pack. Which also means you no longer need to have the Gandi Mail Pack in order to activate an auto-reply message. What’s more, if you already have auto-replies set up in the Gandi Mail Pack, we will be migrating these to Sieve shortly and thus they will be configurable from SOGo, as with all other Sieve rules.
It’s important to note, however, that while you can only add or modify Sieve rules from SOGo, the rules you create will apply to all emails before they arrive in your Inbox. Meaning that no matter how you normally access your email, even if it’s not using SOGo, your Sieve filters will still be applied. And your folders will be the same across all platforms: webmail, your smartphone, Outlook, Thunderbird or Apple Mail.
Be careful not to configure too-strict rules that automatically delete emails; anything deleted by a Sieve rule will be deleted for good.
If you aren’t convinced yet or want a preview of how it looks in action, here are some interesting use-cases:
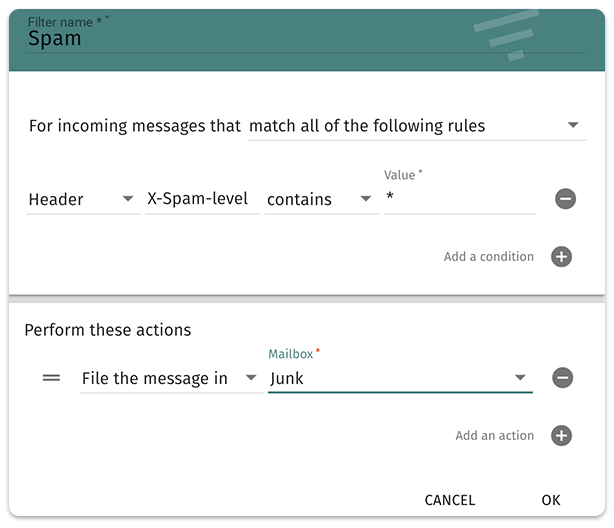
- You can create your own anti-spam filters by configuring Sieve so that it places emails likely to be spam into a spam folder by adding the following rule:
- or reject anything with a high likelihood of being spam:

This filter utilises the X-spam-level header in an incoming email. This is essentially a score assigned to an email as it comes in. The score is calculated on a variety of factors to determine how likely it is to be spam and if the email’s spam score is greater than or equal to 1, it gets X-Spam-level added to the headers (the part of the email with technical details, usually hidden). This shows the score the email received using asterisks, rounded down to the nearest whole number. So for example, a score of 3.5 is represented as ***.
In this example, everything above * gets filtered to spam filter and everything above **** is deleted.
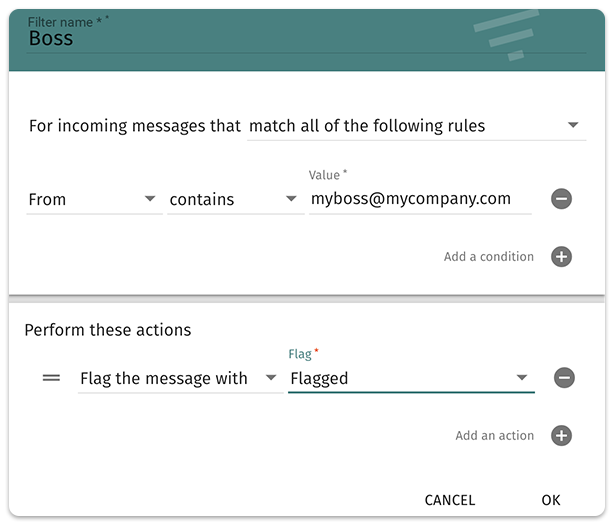
- Flag emails coming from a particular email address:
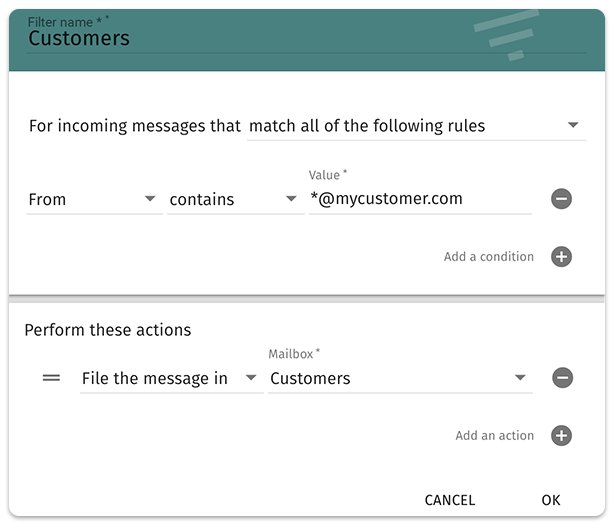
- Or filter all email coming from a particular domain name into a specific folder:
- If you only want to receive emails sent directly to you (and not to a distribution list or that you were CC’d on, for example) on your smartphone, you can create a rule to put messages that do not have your email address in the “To” field directly into a folder called “Bulk” (in this example). That way your Inbox, and hence any alert you may have set up for new email received
in your Inbox on your phone for example, will only contain
email sent directly to you while everything else will sti
ll be available in the “Bulk” folder:

- You can also automatically forward messages containing a certain word or coming from a certain sender to another email address. You can automatically forward anything with “Invoice” in the subject line to your accounting team, for example.
Once you create a filter, you can activate it by checking the box next to the filter name and save it by clicking the Save icon, in the upper right corner of the page.
To get started setting up Sieve filters, log in to SOGo, click the gear icon to open the Settings, then click Mail and then Filters.
Of course, as always, our Customer care team is available to answer any questions if you encounter any problems. And if you have thoughts or other comments, please feel free to share them with us by emailing feedback@gandi.net.
———
For more information about the Sieve protocol and the options it presents, we suggest the following articles from around the web:
https://en.wikipedia.org/wiki/Sieve_(mail_filtering_language)
https://tty1.net/blog/2011/sieve-tutorial_en.html
http://blog.syloe.com/2015/04/triez-vos-mails-automatiquement-avec-sieve/
https://tools.ietf.org/html/rfc5228
———